Table of Contents
Recipes
The Recipes section is dedicated to all aspects of recipe books, meals, meal groups, and dietary setups. The section is divided into two areas, Recipes and Setup.
Recipes
Recipes section is in turn divided into:
- Meal
- Meal groups
- Recipe books
- Tailor recipe books
Meal
To create a new meal press the  button.
This opens a new meal form

For the meal section you will have options that include:
- Meal name
- Number of calories
- Time to prepare (in minutes)
- Proteins (in grams)
- Carbohydrates (in grams)
- Fats (in grams)
- Allergens
- Diets
- Meal groups
- Meal image
- Meal video
- Description
You can also check the box  to make the meal free for your users.
After all the data is entered you can proceed by adding ingredients for your meal. This is done by pressing the  button.
This opens a new ingredient form where you can enter ingredient name, quantity and unit.

When you are finished with adding all the ingredients that are required for your meal, proceed with adding preparation steps by clicking the  button.
Type a description for as many steps that you think are necessary and finally press the  button to add a newly created meal to your library.
Try to be as detailed as possible so that your users can have real benefits of using meals and recipe books that you have created.
Meal groups
In the meal groups section you will have general options that include:
- Breakfast
- Lunch
- Dinner
- Snack
You can set eating time for each meal group and if you wish you can also add new meal groups by pressing the  button.
Recipe Books
To create a recipe book start by clicking the  button.
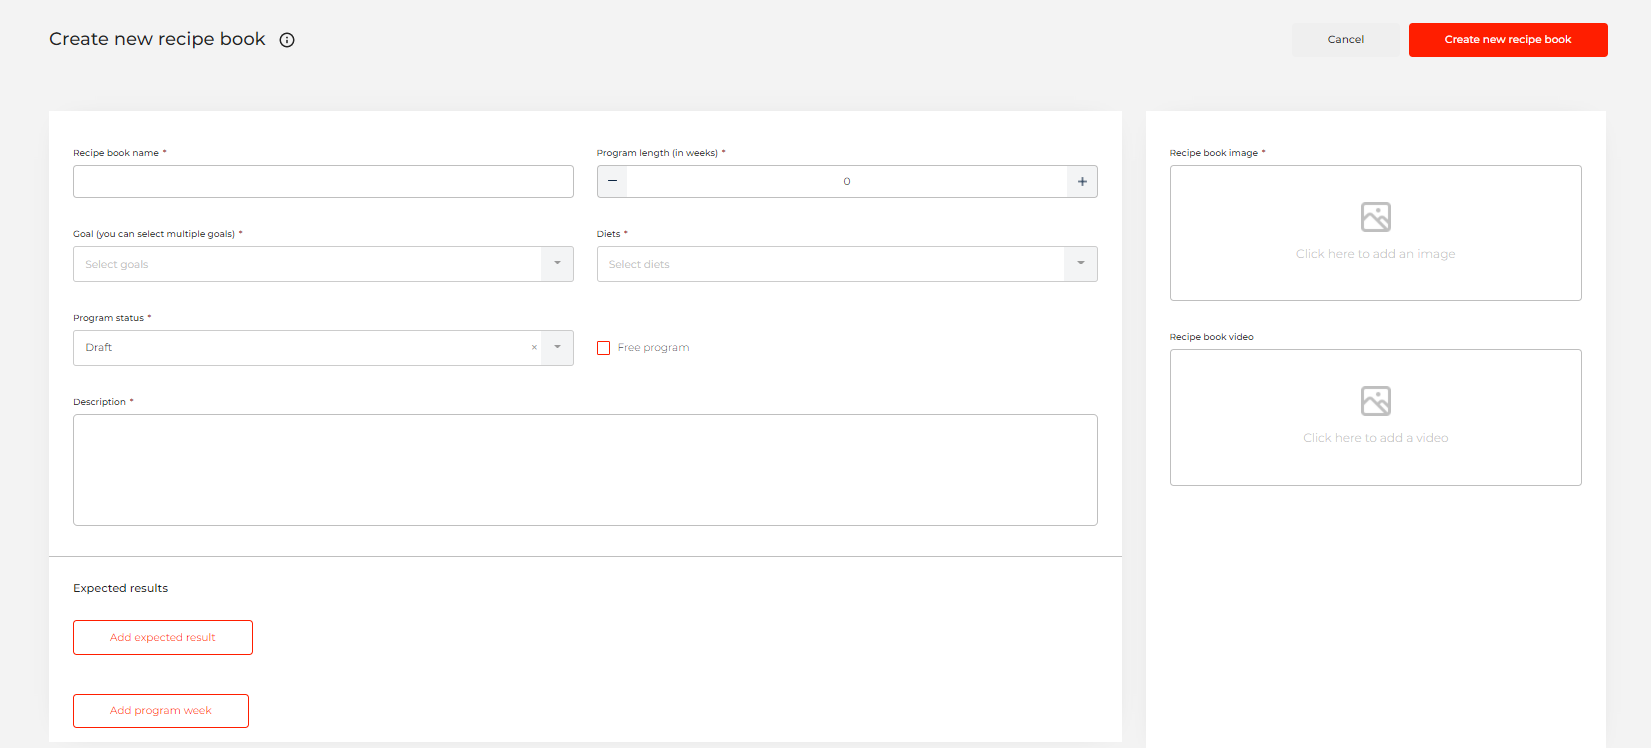
This opens a new Recipe Book form
Inside you will have options that include:
- Recipe book name
- Program length (in weeks)
- Goal (you can select multiple goals)
- Diets
- Program status
- Recipe book image
- Recipe book video
- Description
You can also check the box  to make the recipe book free for your users.
To add results that your users can expect from this recipe book press the  button.
The next step is to add a week by pressing  button.
You will get a new form where you will add Day 1 to your recipe book by clicking the  button.
Day 1 form will have an option to select one of the previously created meal groups (breakfast, lunch, dinner, snack) and an option to add meals to an associated group. Proceed with the same principle and create Day 2, Day 3, Day 4, etc.
After you have added as many weeks as you wish and all the meals that are needed for those weeks, you can finally press the  button to add a newly created recipe book to your library.
Aim for at least 3 or 4 meals per day, and have at least 2 weeks of content so that the recipe books you created are more detailed and far more attractive to the end-users.
Tailor Recipe Books
To create a tailor recipe book start by clicking the  button.
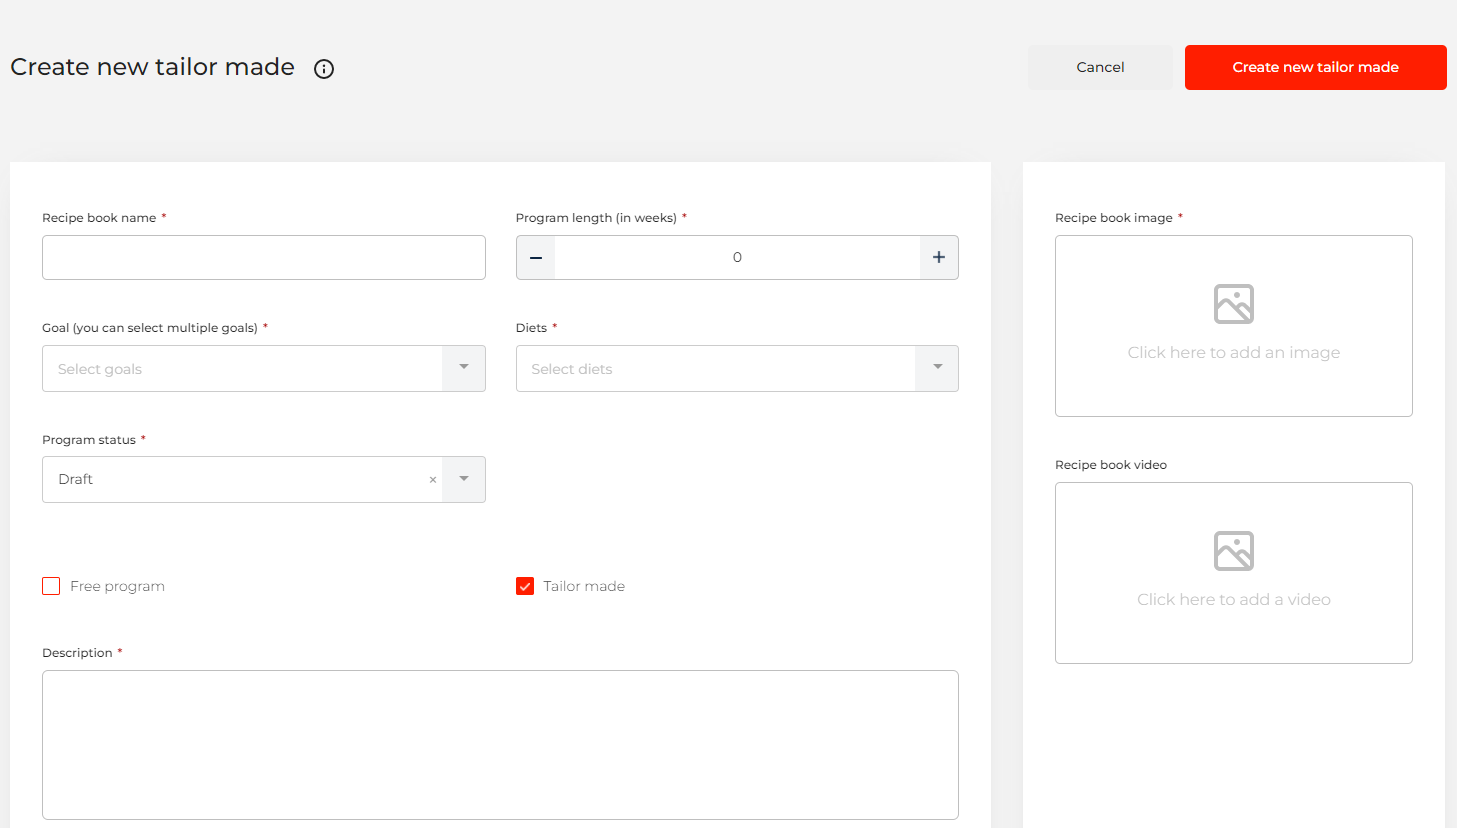
This opens a new Recipe Book form
Inside you will have options that include:
- Recipe book name
- Program length (in weeks)
- Goal (you can select multiple goals)
- Diets
- Program status
- Recipe book image
- Recipe book video
- Description
You can also check the box  to make the recipe book free for your users.
To add results that your users can expect from this recipe book press the  button.
The next step is to add a week by pressing  button.
You will get a new form where you will add Day 1 to your recipe book by clicking the  button.
Day 1 form will have an option to select one of the previously created meal groups (breakfast, lunch, dinner, snack) and an option to add meals to an associated group. Proceed with the same principle and create Day 2, Day 3, Day 4, etc.
After you have added as many weeks as you wish and all the meals that are needed for those weeks, you can finally press the  button to add a newly created recipe book to your library.
Each Tailor Plan can be charged individually and outside the regular app subscription fee. This payment needs to be processed through your landing page. You may decide to vary your pricing according to the degree of detail in each tailored plan. For example, a two-week plan for a client may cost less than a three-month plan.
Setup
From the setup part, the user can control all lists and terms in relation to Nutrition.
The available pages are:
Allergens
- Celery
- Cereals containing gluten
- Crustaceans
- Eggs
- Fish
- Lupin
- Milk
- Mollusks
- Mustard
- Nuts
- Peanuts
- Sesame seeds
- Soya
- Sulphur dioxide
Diet
- Standard
- Vegetarian
- Vegan
- Paleo
- Keto
- Dukan
- Atkins
- Low-Carb
- Ultra-Low-Fat
- Intermittent Fasting
Food preference
- No food preference
- Vegetarian
- Vegan
- Pescatarian
More information you provide in the lists will enable more options on the Recipe books and enhance the experience of the end-users.

